Share
Lighting the “Silo”
“Silo” (aka “knock out,” “cut out”, “white seamless”) is an industry term for images shot against a seamless white background. Unli...
“Silo” (aka “knock out,” “cut out”, “white seamless”) is an industry term for images shot against a seamless white background. Unlike a traditional silhouette, the subject is lit, and the benefit of the silo is that the subject can be easily extracted from the background for a myriad of uses.

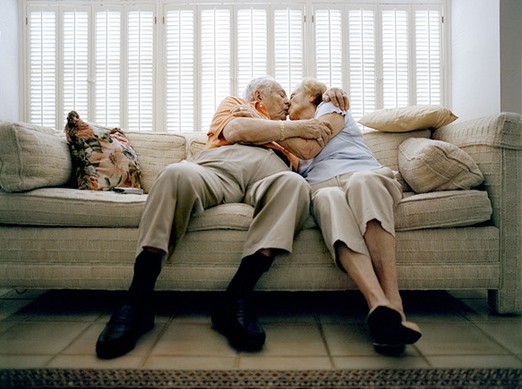
Photo by Greg Lawler / #PSC000208519
Setting up a White Seamless
Shooting a subject on a white seamless background is a great way to produce stock photography because a designer can easily drop type around the subject, or extract the subject and composite a new photo. Unfortunately, setting up a white seamless shot usually requires a minimum of three lights (two on the background and one for the subject – aka the key light), so an initial investment in strobes is necessary to produce this type of shot. Here’s a quick and dirty primer.
Equipment list:
- Minimum of 2 strobes for the background
- 1 strobe as the key light
- Light meter
- White background
For the strobes, you can use anything from a hotshoe flash to high end strobe equipment. The Strobist has tons of examples of shooting very cool, commercial quality images using flashes that cost a few hundred bucks. You can also invest in high end equipment like the Profoto Acute, but it’s certainly not necessary. The main difference in equipment is 1) amount of light (usually represented as guide number on hotshoe flashes, or the inaccurate watt/sec on strobe systems), 2) flash duration (only relevant if you’re shooting something fast moving and want to freeze the action (like an athlete in motion), 3) recharge rate, and 4) consistency of color temperature. If you’re shooting portraits or still life, then a flash will suffice in most cases.
I use a Sekonic L-358 light meter, but any light meter with a flash mode will work. A light meter that only has an incident/ambient mode will not work for this type of photography.
What is white seamless?
You can buy large rolls of paper in a variety of colors for use as a background. The size of the rolls ranges from 10″ wide to 140″ wide. Some photographers custom order fabric backgrounds or even build cycloramas.
Photographers in the field will use tape to affix pieces of paper to a wall when they need a neutral background, or they will various rigging devices.
Flash Theory
Dealing with strobes for the first time can often be intimidating because they don’t initially seem to operate the same way shooting with natural light does. For purposes of this tutorial, let’s assume that you’re shooting indoors – whether it’s a studio or your bedroom makes no difference.
Rule #1: Shutter speed doesn’t matter
I know, it sounds crazy. But think of it this way: A flash is generally much more powerful than any other light source besides the sun. This is definitely true when we’re indoors. So if you have a really high output light source, then the only thing that matters is the duration of that flash. If the flash “pop” lasts for 1/1000th of a second, then it doesn’t really matter if my shutter speed is 1/500th or 1/60th because the bright light is only sustained for 1/1000th of a second, and the ambient isn’t enough to alter the exposure.
Of course, if you’re ISO is high enough and your aperture is wide enough, the ambient light will start to affect the exposure, but that’s too complex for our purposes.
Rule #2: White Seamless has to be a minimum of 1-stop overexposed
If you have a white piece of paper, and you want to guarantee that it’s white (and not shades of gray), then you have to make sure that it’s exposed at least 1-stop more than your subject. For example, if your subject is exposed at f/5.6, then your background has to be at least f/8. If your subject is exposed at f/8, then your background has to be at least f/11, etc, etc.

Photo by Clint Blowers / #PSC001087324
Rule #2: White Seamless shouldn’t be exposed much more than 1-stop over
Generally, you’ll hear photographers say that you can go 1-2 stops overexposed on white seamless. In practice, I’ve found that when you go too much over 1-stop, the white background can start to reflect so much light that it causes flare in your pictures. Flare can manifest itself as a milkiness to the image, or you might start to see circular lens flare. For this reason, I like to keep my subject at least 8 feet away from the background, and I like to keep the background as close to 1-stop over the key light as possible.
Rule #3: Ignore Rule #1 and Rule #2
I’ve seen a lot of great silo where the white isn’t completely white. It’s nice to avoid clipping the whites altogether and maintaining a little tone in the image. The main key is consistency of color, and decisive/intentional use of light.
The Set-up
- Set up a white background. This can be seamless paper, foam core, a white sheet, or a white wall.
- Set up your strobes about 3 feet from the background and face them towards the center of your background. There are a lot of different lighting modifiers that you can use from umbrellas to pans. The general goal is to spread the light across a wide area.
- Meter your background. There’s no ideal power setting. You should shoot at an aperture that gives you the desired depth-of-field. Usually, I set my strobes up so that the background is f/11 – f/16 at ISO 100.
- For full-length shots, you might need another pair of strobes. I like to meter down the center of the background, from top-to-bottom, until I get everything within 0.3 stops.
- Once you have your background set up, place your subject approximately 8 feet in front of the background. Then set up your key light so that the subject is exposed 1-stop less than the background. In my case, it’s f/8. If you can’t get it quite right, it’s always better to have a little more light on the background.

Photo by Don Pye / #PSC000189851
The position of the keylight and type of modifier can make a huge difference in the appearance of shadows. Also, don’t forget that you can use reflectors to fill in shadows.
Resources:
Here are a few more resources I’ve found on the web that will give you more insight into great lighting (and they’re much better photographers than me!):
Here are a few more resources I’ve found on the web that will give you more insight into great lighting (and they’re much better photographers than me!):
Zack Arias:
White Seamless Tutorial
Next Post: Photos of Barack Obama on PhotoShelter
Previous Post: Pigs in Space: First on the Moon.
You May Also Like
-

Expert Advice and Top Tips from Pro Photographers for 2024
What’s one piece of advice you would give to aspiring or up-and-coming photographers? We asked nine experienced photographers and PhotoShelter members to share their top tips for those looking to get ahead in their photography careers. From finding your own visual voice to working with a mentor or photo assistant, each piece of advice listed […]
-

What’s On Your Photography Holiday Wish List?
The holiday season is around the corner and that means it’s the perfect opportunity to upgrade your gear or find that special gift for the visual storyteller or photography enthusiast in your life. We reached out to a handful of renowned photographers and PhotoShelter members, each with their unique styles and preferences, to bring you […]
-

Share a Photo That Means the World to You
We all have a photo that means the world to us. Maybe it’s one we made ourselves – the first photo from our first camera. It could be an old family photo in a beloved photo album. Or maybe it’s an iconic image that hangs on our wall at home. With World Photography Day coming […]