Share
What’s the Audio Equivalent of an Overexposed Photo? (And 5 Other Light/Sound Comparisons)
Cameras capture and record different wavelengths of light while audio recorders capture different wavelengths of sound. Although there are differen...
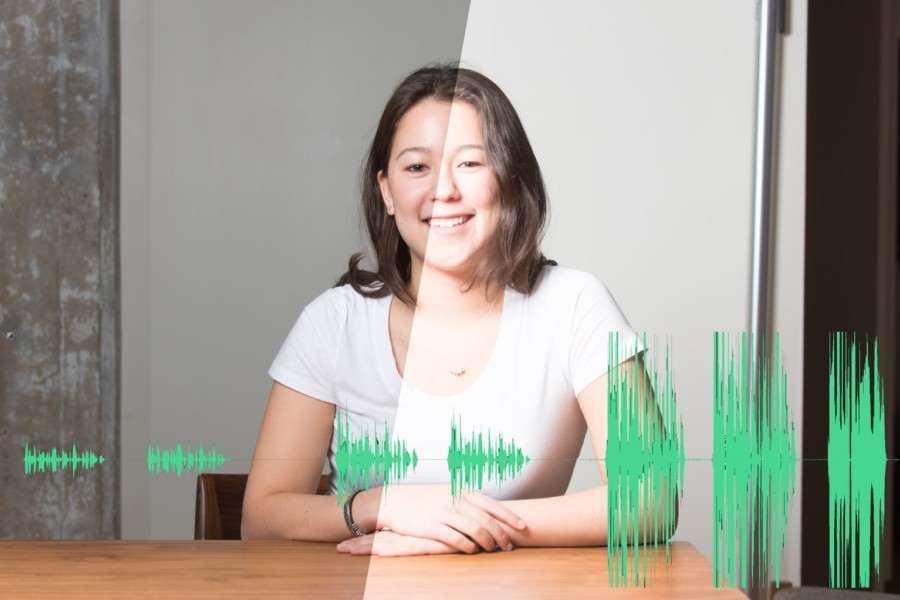
Cameras capture and record different wavelengths of light while audio recorders capture different wavelengths of sound. Although there are differences between light and sound, as well as the way our eyes and ears perceive them, there are many overlapping analogs that make comparing them an interesting, albeit imperfect thought experiment.
Digital signal processing is the catch-all term that describes the conversion of analog signals like light and sound into digital bits via an analog-to-digital converter (ADC). The digital data can be easily manipulated algorithmically on devices like a computer. Of course, photography is a single exposure with a fixed exposure at each pixel, whereas an audio recording typically captures sounds over a significantly longer time interval. Although many of the concepts between photo and audio are the same, terminology and emphasis varies.
You probably know what an overexposed photo looks like, but what does “overexposed” audio sound like? And are there other digital comparisons we can make to help us understand the physics of the situation? Let’s take a look and listen.
Clipping & Blown Highlights
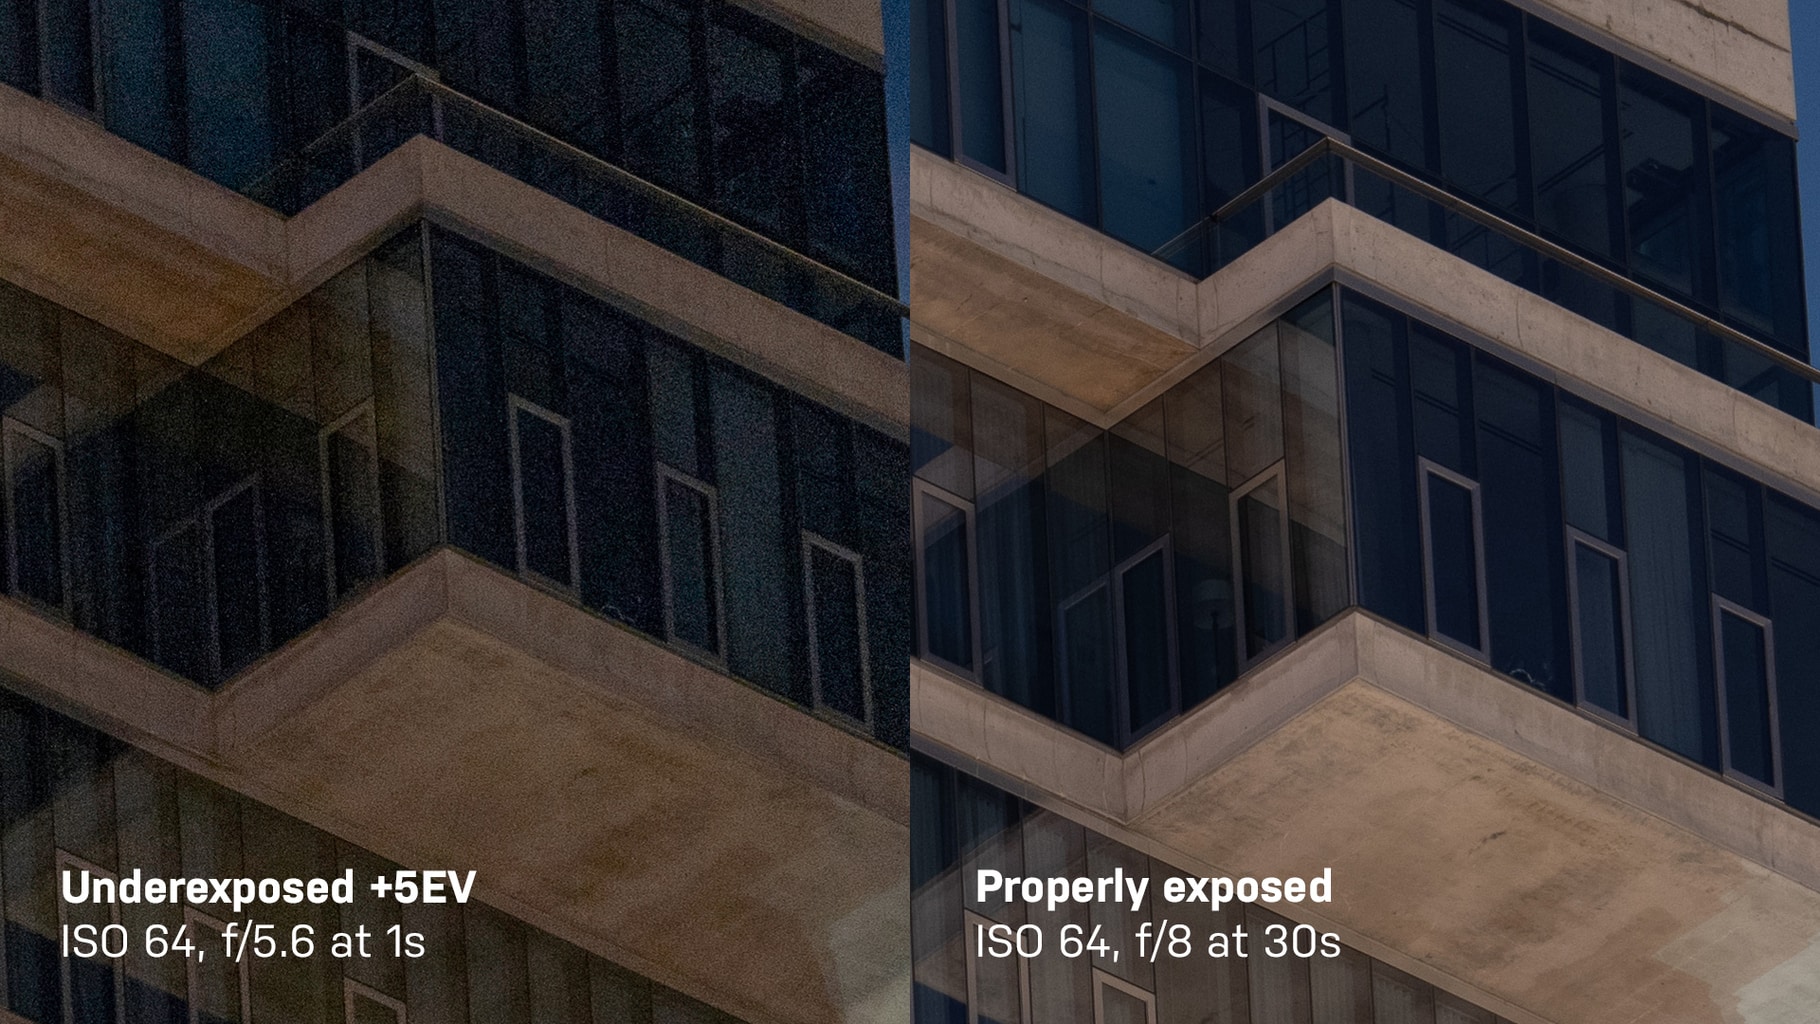
Digital camera sensors consist of photon gathering wells. Varying the exposure by changing the aperture or shutter speed affects the number of photons that hit the sensor. If the amount of light exceeds well’s capacity or the digitization range (by increasing ISO), then the sensor can’t record differences in light beyond that threshold. The well is like a bucket that has overflowed with water. The sensor can’t determine if it overflowed by a drop or a gallon. Post processing can’t save an overexposed photo (i.e. “clipped”) because clipping remains even when the gain is reduced.
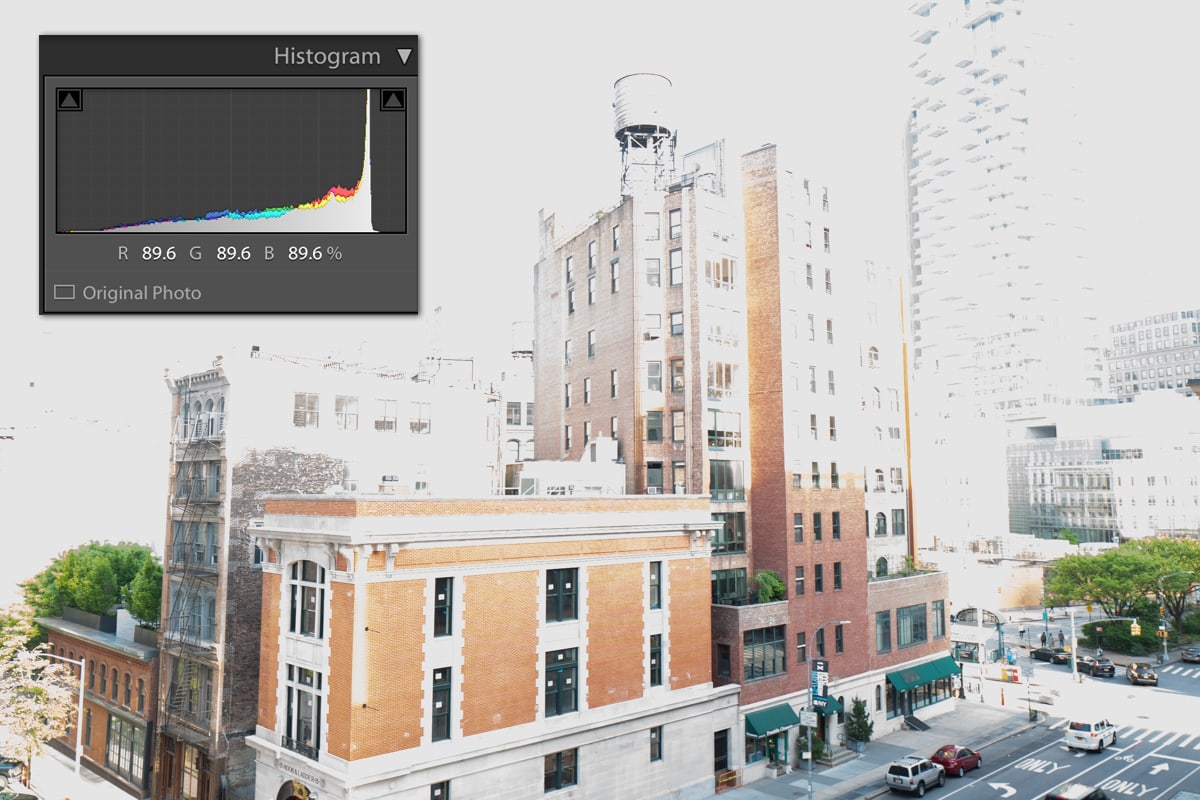
Reducing the exposure of a photo with blown highlights(in this case by 2EV) can’t fix the photo.
Digital recorders capture an audio signal through a microphone or a “direct input” from an instrument like a synthesizer. Dedicated audio recorders typically have a gain control, which is like the ISO knob on your camera. The gain amplifies the outgoing audio signal, before it’s increased even more by pre-amplifiers that feed into a recorder. A recording engineer uses audio meters to keep the signal under the clipping point.
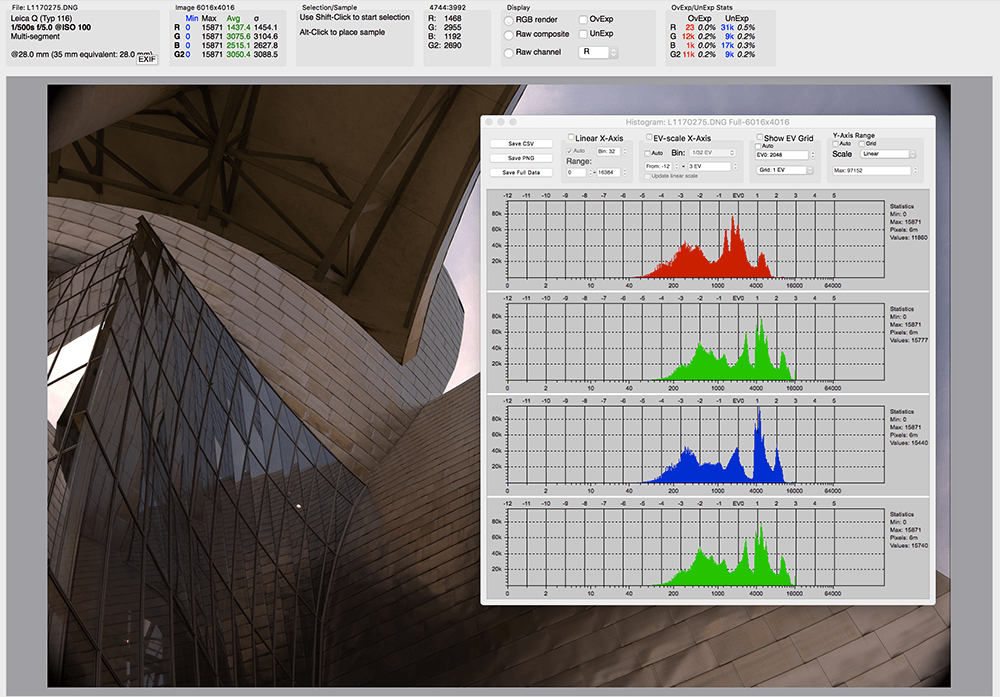
Applications like RawDigger allow photographers to view histograms from the RAW files – crucial for ETTR photography
In photography, some experts recommend ETTR (expose to the right) to maximize the amount of light hitting the camera sensor while avoiding clipping. In audio, engineers often target a maximum peak of -6dbFS (about -1EV) to provide adequate headroom – the space between the recording peak and the distortion ceiling – because audio engineering has so many user-controlled I/O in the production chain (e.g. microphone, pre-amp, limiters, buses, etc). The final audio “master” is often raised to right below the clipping point.
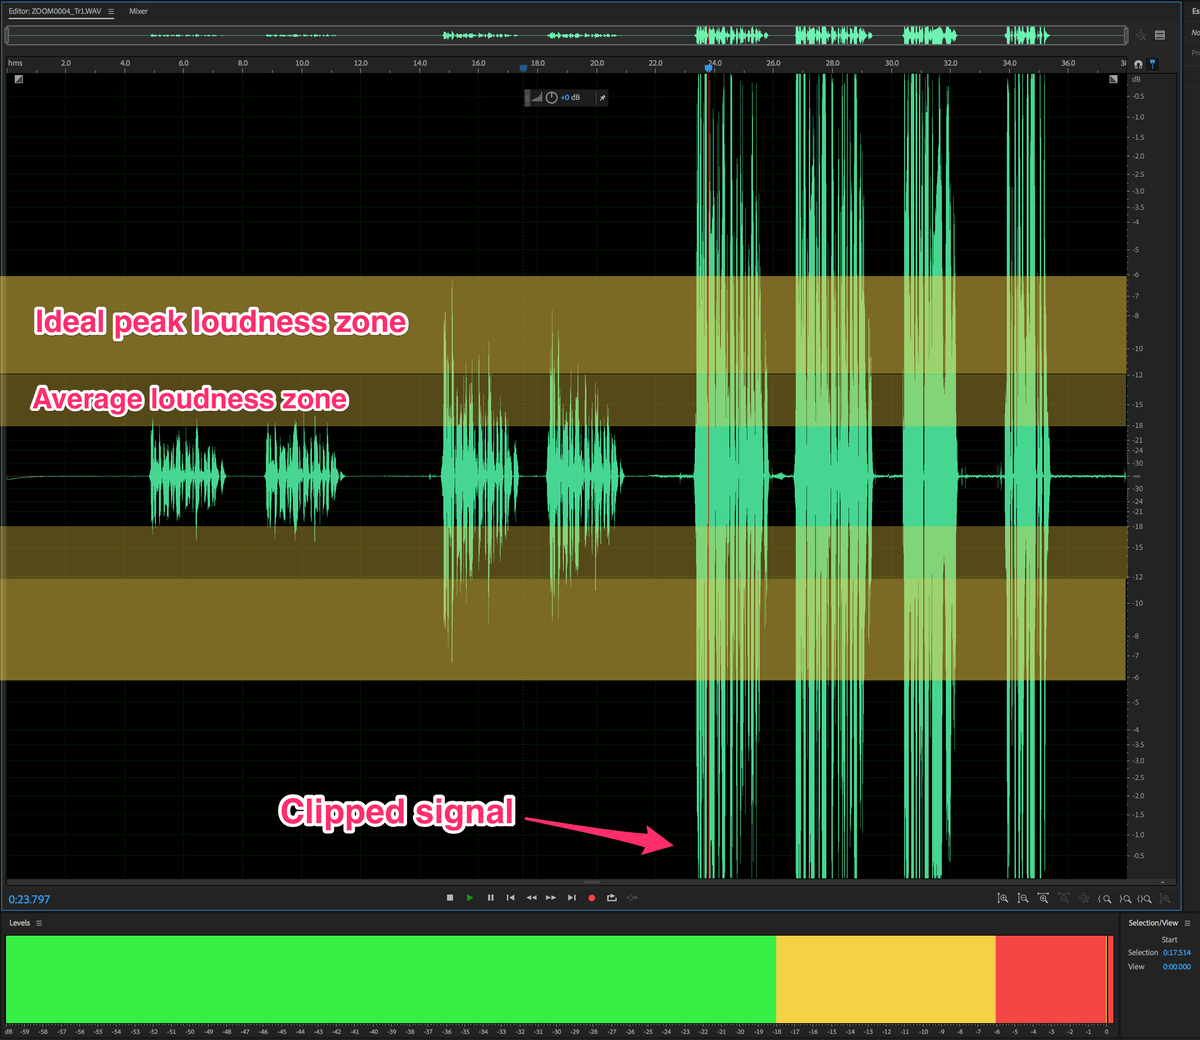
Like an overexposed photo, listening to clipped audio isn’t pleasant. Clipped audio sounds scratchy and tinny and lacks nuance and expression.
Example 1: The same text recorded at 3 different levels. The last level is too high and the audio is clipped.
Exposure Slider and Volume
The best camera sensors can capture a huge dynamic range. This is one reason that photographers can use the exposure slider in RAW files – sometimes up to 5EV and still get convincing results. Moving the exposure slider applies an equal amount of signal gain to the entire image post image capture, so the dynamic range and signal-to-noise ratio (SNR) remain the same. But if noise is present in the image, it will also be amplified.
Similarly, you can crank up the volume on a low audio signal (i.e. a signal with a low SNR), but you might start to hear the hiss of noise.
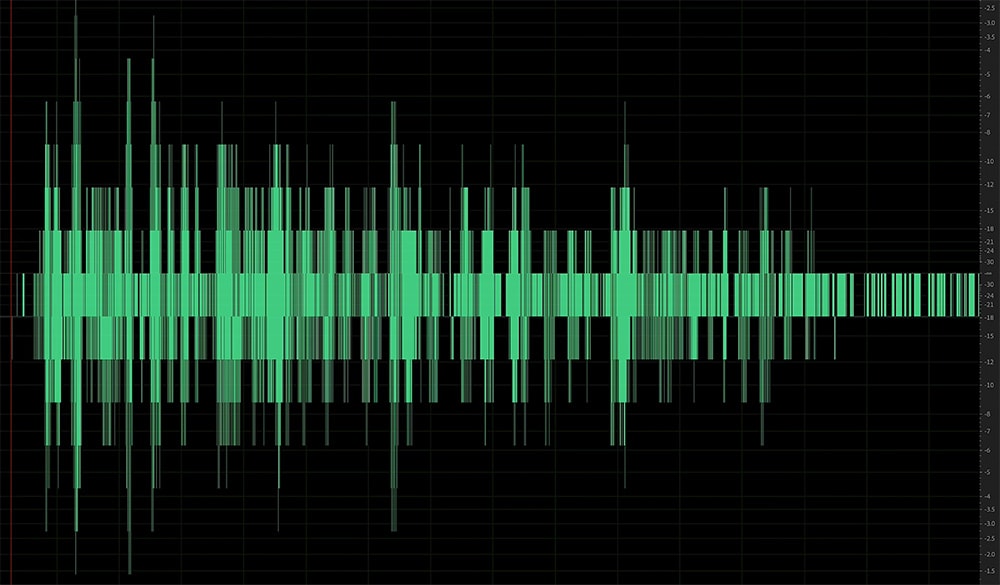
The wave form of a very low signal that has been repeatedly increased looks “posterized” – similar to a small image that’s been enlarged.
Example 2: Text is recorded at a extremely low level then gain staged until it reached a peak of about -6dbFS.
Tone Curve & EQ
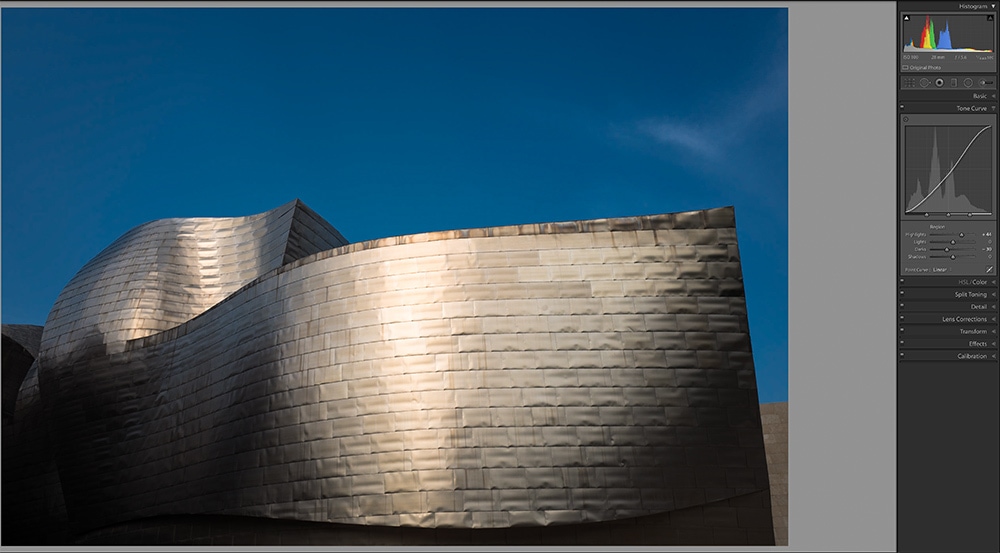
Tone curves in image editing software allow photographers to selectively adjust different tones throughout an image. Many photographers apply an S-Curve to create midtone contrast in their images. More sophisticated retouchers apply curve adjustments to different color channels.
In audio, engineers apply equalization (EQ) to boost or reduce certain frequencies. This is particularly helpful when mixing multiple instruments where you might need a guitar solo to not only be louder, but to be slightly brighter to stand out in the mix. Just as RAW images can appear flat before processing, a microphone (and other components in the recording chain) might capture a “flat” sound that needs to be enhanced through EQ.
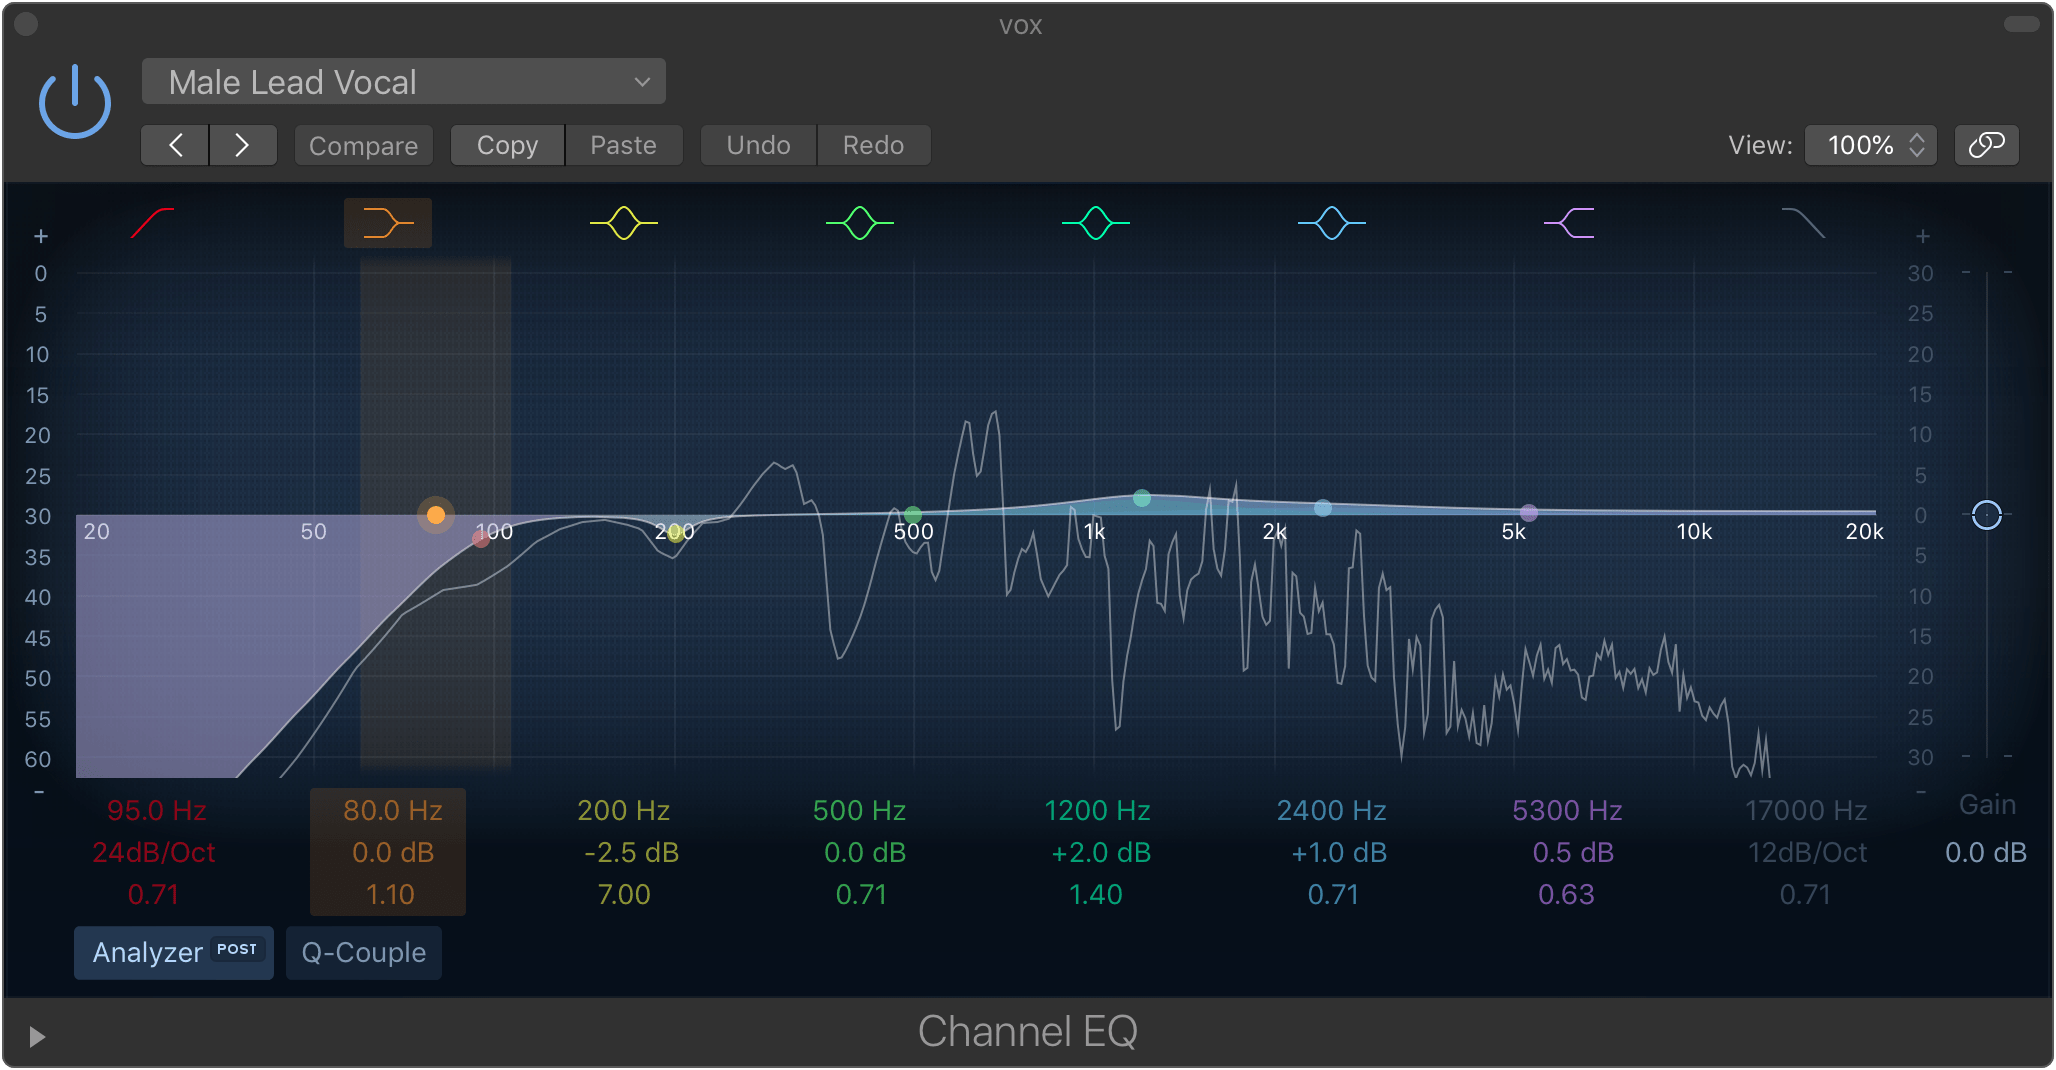
Example 3: Tenor sax with EQ that brings out the richness in tone.
Example 4: Overly bright EQ with boosts at 900 Hz and between 5 kHz – 10 kHz
Neutral Density and Microphone Pad Switches
Photographers sometimes use a graduated neutral density (ND) filter to capture a sunset scene where the sun near the horizon might overpower the foreground exposure. Using the filter allows for a single exposure rather than relying on post-processing techniques like HDR because the ND attenuates light before it hits the sensor.
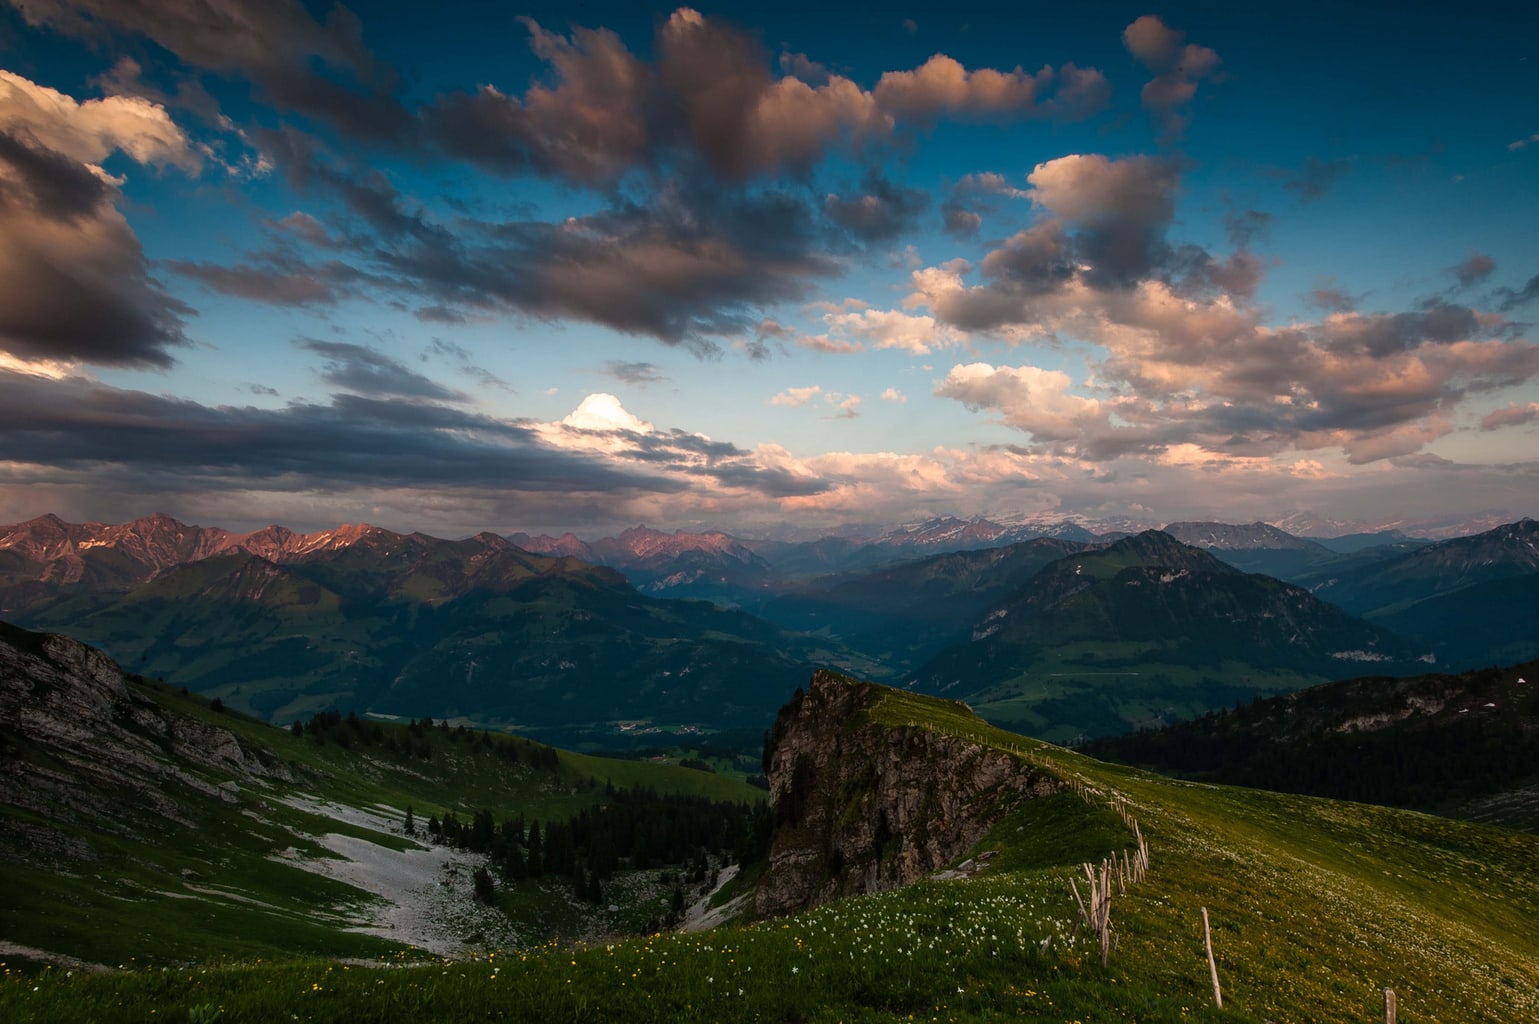
Col de Lys. Photo by Gustave Dehilage (CC BY-NC-ND 2.0). Taken with a 0.9 ND Soft Grad filter.
Microphones can withstand a certain sound pressure level (SPL) before the circuitry causes audible distortion. Although it’s not common to hit this type of SPL with the human voice, it’s very common when recording a percussion instruments like a snare drum. Some condenser microphones have a pad switch which lowers the voltage level (-10db is common) from the mic’s capsule before it reaches the internal preamplifier to avoid distortion (other microphones are designed specifically. Simply lowering the recording level won’t avoid this distortion because it’s introduced before the signal gets to the recorder.
Vibrance and Audio Compression
In Adobe products, Vibrance is a smart tool that increases the intensity of more muted tones without affecting already saturated colors. The selective nature of the tool – when used properly – has a more natural looking effect than simply boosting saturation.
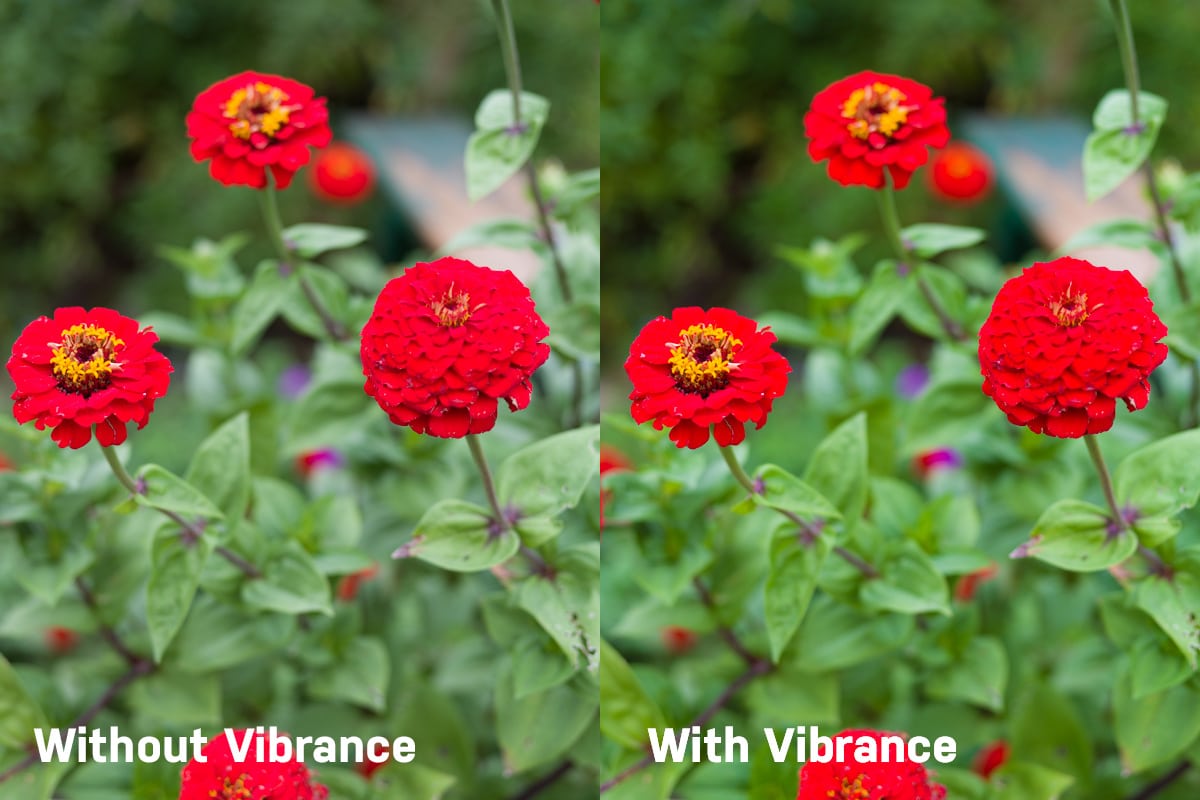
The saturated red of the flower isn’t affected by +50 vibrance, but the greens and purples are noticeably more saturated.
An imperfect analogy is audio compression. Hardware and software audio compressors affect the loudness of a sound at a user-defined threshold. For example, upward compression increases the loudness of softer sounds without affecting louder sounds past a threshold. Downward compression, the more commonly used form, helps to attenuate transients and other big dynamic swings. The compression ratio determines how much the loudness of sounds within the threshold are affected (e.g. 2:1, 3:1, 5:1). Unlike audio normalization which applies a constant gain to a recording, compression alters the dynamic range by selectively boosting different loudness levels.
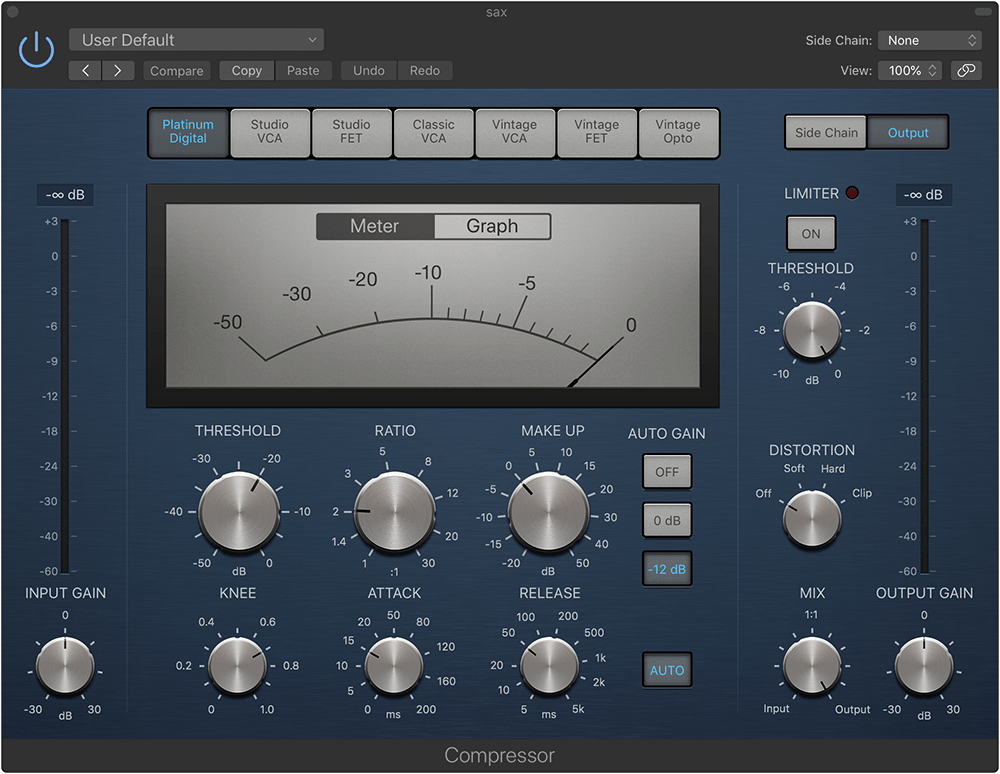
A software compressor in Logic X
Unless you have a good pair of headphones or are a trained audio engineer, you probably won’t be able to hear the effects of compression in something like a music track. But the “radio announcer” voice is a very obvious way to understand the effect.
Example 5: Text recorded with no compression
Example 6: “Radio announcer” compression added to same audio clip.
Healing Brush & Healing Brush
Photographers use Photoshop’s healing brush to remove dust spots, stray hairs, and any unwanted visual artifact from their photos. The healing brush (and context-aware fill) has gotten progressively smarter over time with its ability to intelligently select a sample point.
Audio engineers regularly deal with lip smacks, throat clearing, and other vocal anomalies. Cutting out a section of audio can lead to weird sounding gaps, and many of these types of “noise” happen over a broad frequency spectrum, making it difficult to eliminate strictly through EQ. But not to fear, Adobe Audition also has a healing brush tool that works very similarly to its Photoshop cousin. Brush over the problem, and voila! Clean audio.
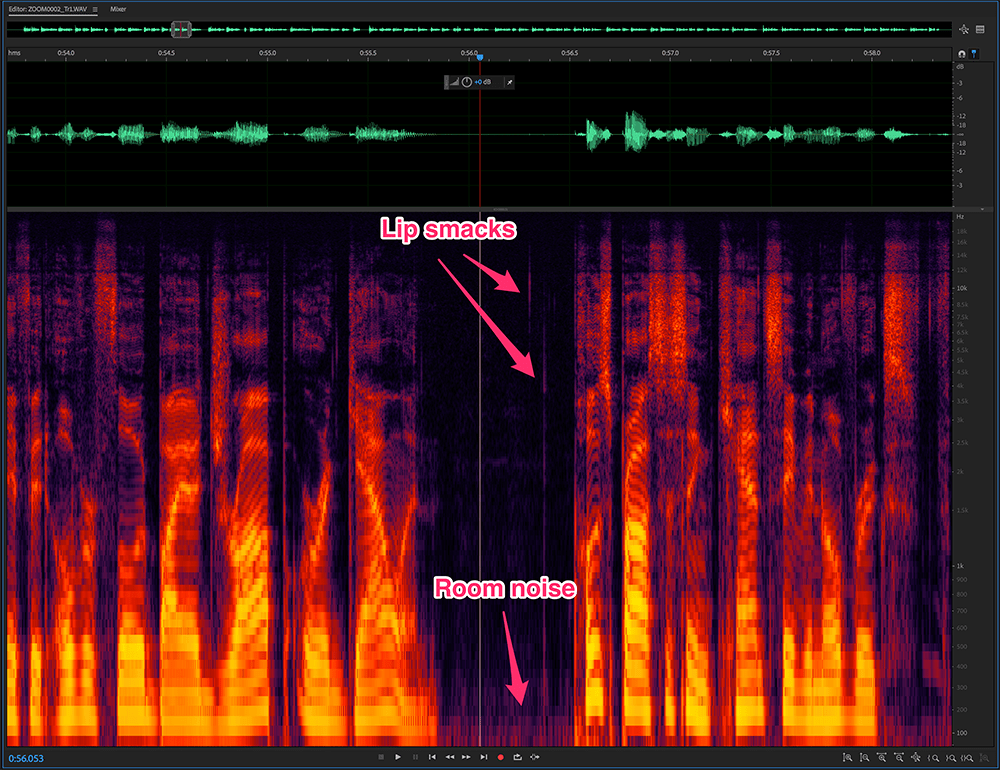
The spectral frequency display in Adobe Audition shows frequency on the Y-axis and time on the X-axis. The intensity of color corresponds to the amplitude of a given frequency. The display allows for visual editing of waveforms.
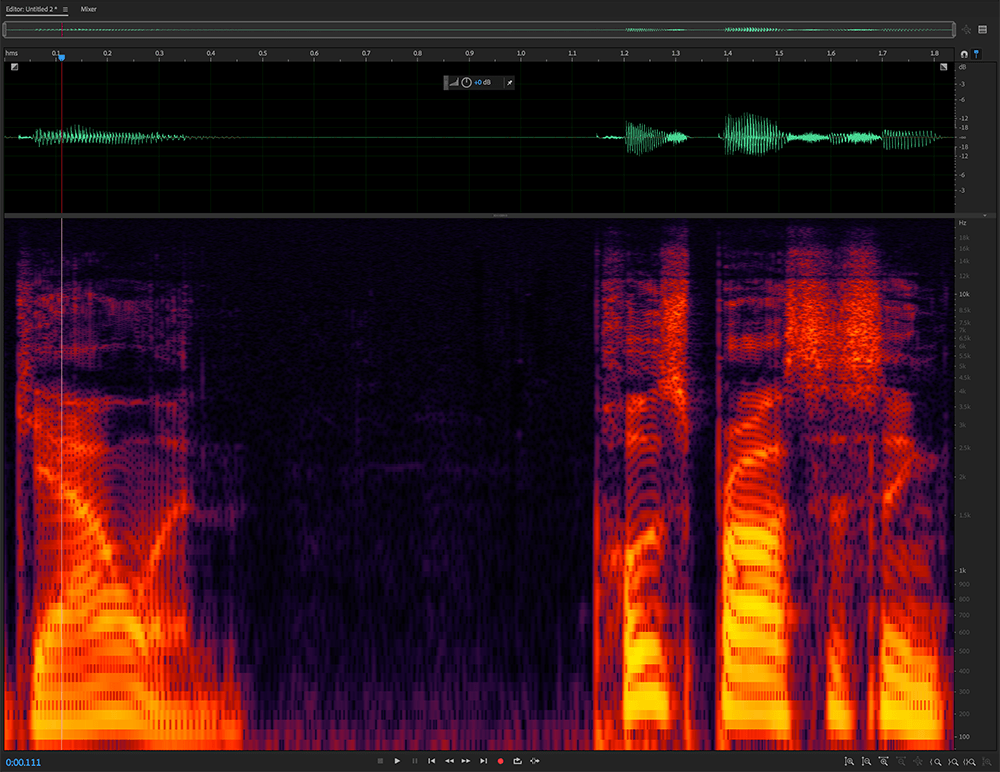
Using the healing brush to remove the lip smack preserves some of the sonic energy at various frequencies for more natural sounding audio.
You May Also Like
-

Expert Advice and Top Tips from Pro Photographers for 2024
What’s one piece of advice you would give to aspiring or up-and-coming photographers? We asked nine experienced photographers and PhotoShelter members to share their top tips for those looking to get ahead in their photography careers. From finding your own visual voice to working with a mentor or photo assistant, each piece of advice listed […]
-

What’s On Your Photography Holiday Wish List?
The holiday season is around the corner and that means it’s the perfect opportunity to upgrade your gear or find that special gift for the visual storyteller or photography enthusiast in your life. We reached out to a handful of renowned photographers and PhotoShelter members, each with their unique styles and preferences, to bring you […]
-

Share a Photo That Means the World to You
We all have a photo that means the world to us. Maybe it’s one we made ourselves – the first photo from our first camera. It could be an old family photo in a beloved photo album. Or maybe it’s an iconic image that hangs on our wall at home. With World Photography Day coming […]