Share
WATCH: Mastering Food Photography Composition with Darina Kopcok
Last week, we sat down with food photographer, writer and educator Darina Kopcok for a lesson in composition for food photography and a live Q&...
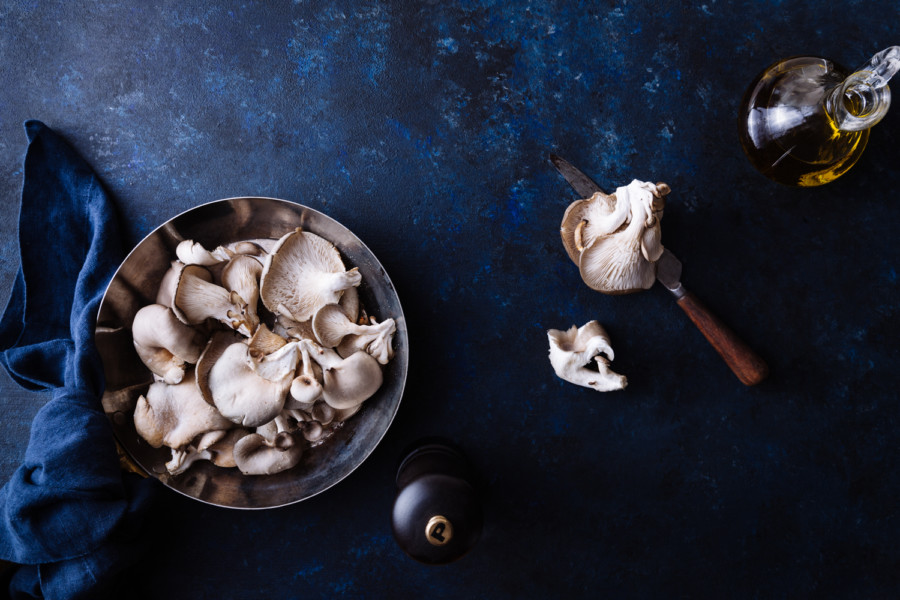
Last week, we sat down with food photographer, writer and educator Darina Kopcok for a lesson in composition for food photography and a live Q&A.
Darina walked us through the principles of composition, color theory and how to apply compositional patterns like the Rule-of-Thirds, Phi-Grid, Golden Triangle and Fibonacci Spiral, before taking questions about lenses, lighting and more.
Watch to learn:
- Tips on proportion and scale
- How to use color as a compositional tool
- A variety of patterns and symmetries that can energize your images
On-Demand Webinar: Mastering Food Photography Composition with Darina Kopcok

All your questions answered
Thank you to everyone for submitting questions during our live Q&A with Darina! Read through some of her answers below and feel free to tweet any lingering questions to @photoshelter and @Gratinee.
This Q&A was lightly edited for clarity and length.
Do you prefer artificial or natural light? How do you go about lighting your photos most of the time?
DK: When I first started photography, I definitely used natural light for many years. I was learning, and I think it’s really important for people to start there. Once you learn natural light, then you can go on to artificial light, and you understand the principles. So it’s really just a matter of getting the technical part of the lighting down. I would say that I use artificial light 95% of the time. And the reason for that is it’s basically what’s expected, based on the type of commercial work that I do.
Natural light is really good for editorial photography, but sometimes not the best for certain commercial photography, because the light looks very produced. Even when I’m shooting at home for myself in my home studio and I could use natural window light, I do tend to prefer artificial light, just because that’s what I’m used to and I have a greater sense of control over my lighting in general. I’ve developed a certain lighting style in my images that I like to be consistent throughout most of my work, even if it’s something that I’m doing for my portfolio.
Do you have any specific lens recommendations for food photography?
DK: I use a full frame camera, the Canon 5D, and the lenses that I use most often for that would be a 100mm macro. I really love to use it not only for macro shots, but if you step a bit of a distance away from your set, you can actually get really nice food portraits. In that case, you’re not actually using the macro capabilities of the lens. So it’s kind of like having two in one.
I think that if I were only able to have one lens in my kit, that would probably be the one, but I also have a Canon L series 24-70mm zoom lens. I find that it’s actually really sharp, considering it is a zoom lens. Prime lenses are usually preferable for food photography, because you get such a sharpness out of it. Zoom lenses have a lot of moving parts, and that kind of reduces the quality. But I find that lens really, really good in terms of the sharpness. And I use that a lot for flat lays, or I use it at around 60-65mm for a good portrait. Then of course I can sometimes do the wide angle shots that I need to.
If you have a cropped sensor on your camera, I think go for the 50mm – they call it the nifty 50 because it’s not very expensive and it’s great for a lot of shots, especially flat lays. I would also probably suggest a 60mm macro for a cropped sensor as well. And then if you do upgrade to a full frame, you can use it very much like you would use a 50mm.
Do you have any recommendations or tips about tripods? Do you typically use a tripod for your work?
DK: I always use a tripod. I have a Manfrotto 190. I really like the Manfrotto line of tripods. I think it’s important to get quite a sturdy tripod. So if you’re looking at something that costs less than $300, it’s probably not going to do the trick for you, because the tripod has to be able to withstand the weight of your lens, your camera and a speed light. If you use a speed light, maybe you’re going to be using it with an extension arm. So I would definitely invest in a better tripod.
Then when you have that, you have it for many years. So payload is really important. It also has rubber feet, so there’s no slippage. You can get an extension arm too, or you can get a tripod that actually has an extension so you can do overlay shots. And if you’re using that, you just want to make sure that you counteract the weight of your camera with a sandbag or some kind of weight so it doesn’t topple over.
Here’s a fun question for you. Does your job make you hungry, and do you eat before a shoot?
DK: That’s funny actually. Yeah, sometimes I eat, but I find that when I’m shooting, I don’t eat. I think I’m just in work-mode and have a lot of energy, but typically you are supposed to eat. You’re supposed to have a lunch break.
When you’re negotiating your price, even for a restaurant, you want to ask them if they’re going to feed you and what the expectations are around meals, because I always work with an assistant, too. I’m often working with a food stylist, so I want to make sure they’re going to be fed. Whether I’m working with a restaurant or if I’m working with a client directly, that’s a conversation that I have, because that has to be a part of the estimate; money for lunch, money for snacks, coffee, that kind of thing. That should be subsidized by the client.
What is the most difficult food you’ve had to photograph?
DK: The most difficult… Meat, especially cooked meat. Generally brown foods can be quite difficult, but meat tends to be hard to shoot, and it usually involves quite a bit of trickery on the food styling part. If I get a client who wants me to shoot meat, that’s not usually something that I’m going to style myself. It’s something that I’m going to hire a stylist for. And again, they have a lot of tricks up their sleeve, like under cooking the meat, using a pastry torch to brown it, or a barbecue starter to put grill marks on it. They soak it in oil to keep it fresh until it’s ready on set. Those kinds of things. So there are ways to work with it and make it look better. But yeah, it’s hard to make it look appealing in an image, for sure.
What are the easiest foods to work with, the ones that you enjoy?
DK: Desserts. They’re a little bit more challenging than just doing the fruit kind of thing, but they look quite attractive. They have nice colors, they tend to look pretty, and you can cut them and arrange them in different ways. You don’t have to necessarily be a baker or bake things yourself. You can go to the bakery, buy things, cut them up, plate them, make them look nice and create a visual story with some elements like coffee, or other beverages and so forth. So I find dessert is a good one that looks nice in the portfolio. It’s fun to practice with and a little simpler, as well, than some other items.
Want to get the answers to all of the questions from the Q&A, including an in-depth look at the principles of composition and how to apply different compositional patterns? Watch the on-demand webinar.
You May Also Like
-

Expert Advice and Top Tips from Pro Photographers for 2024
What’s one piece of advice you would give to aspiring or up-and-coming photographers? We asked nine experienced photographers and PhotoShelter members to share their top tips for those looking to get ahead in their photography careers. From finding your own visual voice to working with a mentor or photo assistant, each piece of advice listed […]
-

What’s On Your Photography Holiday Wish List?
The holiday season is around the corner and that means it’s the perfect opportunity to upgrade your gear or find that special gift for the visual storyteller or photography enthusiast in your life. We reached out to a handful of renowned photographers and PhotoShelter members, each with their unique styles and preferences, to bring you […]
-

Share a Photo That Means the World to You
We all have a photo that means the world to us. Maybe it’s one we made ourselves – the first photo from our first camera. It could be an old family photo in a beloved photo album. Or maybe it’s an iconic image that hangs on our wall at home. With World Photography Day coming […]