Share
It’s World Photography Day. Here are 6 Ways to Get More Out of PhotoShelter.
We think World Photography Day is a perfect time to check in and make sure you’re getting all you can out of PhotoShelter. Below, find six comm...
We think World Photography Day is a perfect time to check in and make sure you’re getting all you can out of PhotoShelter.
Below, find six commonly overlooked or underutilized features. How does your site stack up? Are you using everything?
If implemented, they’ll have you looking professional, put together and authentically you as possible – and we’ve included a few fun PhotoShelter hacks you might not have known about, too! The best part? Many of these are tiny tweaks you can make in minutes.
1. Put your contact information EVERYWHERE
Yes, every PhotoShelter account comes with a contact form. But don’t just rely on that. You want to make it easy for people to contact you. Unlike a homepage where less is definitely better, more is the name of the game here. Put that phone number and email address wherever you can – the header, the footer, your about page, even on the contact form itself.

One thing that’s often overlooked: your location. Photo Editor and photographer Sarah Jacobs recommends including your location on both the homepage and the “About” sections of your site. If you’re in a remote location, be sure to also include the nearest metropolitan area you can or would be willing to travel to for work.
Also consider joining The Blink Network, which allows you to share your location and embed it on your contact page like Brian Adams did on his site.

Being easy to get a hold off pays off.
More info / Do it in PhotoShelter:
– How to customize your contact page
2. Make metadata work for you
The importance of registering your copyright cannot be overstated. Definitely, definitely do that. But don’t forget about your metadata!
James Cavanaugh, Former President at ASMP, says it best: “Metadata is the information included in your photo’s digital file when it’s downloaded from your camera. The standard is the file name, but the more information you can add to this, the better—your contact information, copyright registration, website, keywords, etc. By including metadata, your images are essentially equipped with a tracking device. It will help potential clients locate you when they run across your images out of context, and it will help you prove what’s yours is yours.”
Think of it like sewing digital tags into the collar of your photographs’ sweaters before they go off to play with the rest of the photos on the playground.
James Cavanaugh
Tara Pixley, photojournalist and recent NPPA presidential appointee, doubles down. “You need to put your credit, contact and copyright information in the metadata of all of your images,” she says. Remember that, even if this feels daunting, this simple step can usually be done in a batch process by any of the popular photo editing platforms.
Also remember to include basic information about who or what is in the image, when it was taken and contact information for model releases. These small steps will save you time in the future, and more importantly, save the Art Director and Photo Editor’s time too.
Metadata also helps with search, which can lead to sales. Don’t go crazy with keywords—Google actually isn’t a big fan of keyword bombing—but instead, focus on getting specific.
Got a photo editor from a tourism board interested in licensing fishing photos for their upcoming campaign? If you have your Atlantic salmon photos keyworded, they’re going to be a hell of a lot easier to find.
More info / Do it in PhotoShelter:
– Editing IPTC Metadata in PhotoShelter
3. Your homepage should be your friend, not your enemy
This one sounds so simple, but it always bears repeating. Your homepage can make or break you. Having too much material can overwhelm potential clients and have them questioning what your strengths are. Have too few and it looks like you’re still getting started.
If you’re someone who might need to scale back a bit and have trouble figuring out where to start, photographer and mentor Chris Parkes recommends taking a Marie Kondo approach. Is every single image on your homepage aligned with your brand and how you want to be perceived as a photographer? If not, the homepage isn’t the space for them.
(Plus, remember that you don’t have to kill all your darlings. Instead, just retire them to your Archive or the Unlisted side of your Image Browser for easy access when/if you need them again.)
Tracey Woods, Photo Director for The Luupe, echoes the importance of your homepage. “You really have maybe 5 seconds to grab someone’s attention,” she says, and emphasizes how crucial it is to “always have your best, strongest image first.”

Great images demand the attention of editors, leading them to pause and look deeper into your portfolio. Don’t have people sifting through the last twenty years of your work right off the bat. Make the best first impression possible.
More info / Do it in PhotoShelter:
– Choosing the right design for your work
– Controlling the photos on your homepage
4. Selling image packages isn’t just for grade school
It’s simple: the more you sell, the more you earn. And if you’re looking to earn more, image packages are a great strategy to get people to purchase one or two more extra items. Any sort of bundle option generally makes people feel like they’re getting a deal, so keep that in mind!
Here at PhotoShelter, we offer you the option to sell prints, products, digital downloads or license your images. But far and away the most overlooked sales tool is the lowly image package.
Image packages provide you with the opportunity to offer bulk discounts while also granting you more control over who gets what. If you generally sell prints, consider creating a package that has your most common print sizes and a personal use download. Also, whether they know it or not, offering a lower number of options for buyers likely will help them decide what to buy. After all, people aren’t normally planning on purchasing 10 prints of various sizes or 5 prints and 2 downloads, but when they’re in a package? The choice is a near no-brainer.

You’ve got tons of flexibility so play around and see what works best with your unique clients!
More info / Do it in PhotoShelter:
– Image package 101 & set up
– 10 ways to generate revenue with online sales
5. Quick Send. Just do it.
With so many files being sent via Dropbox or WeTransfer these days, you’d think Quick Send was our greatest kept secret.
The name might be straightforward, but Quick Send has a ton of functionality behind it.
Original file or a downsized JPEG, a single file or an entire gallery, it’s all fair game. You can share your download link to as many or as few people as you want. Plus, it’s extra secure: links are custom generated and only active for a week. Once the week is up, any client would need to get back in touch for a new download link.
Functionality aside, keeping everything under one roof keeps you looking professional. Your branding stays consistent and even with a Quick Send link, you’re still using your URL. It’s also quick, so you can reply fast to your client.
Overall, it’s a win-win for both you and your client. (Sorry not sorry, Dropbox.)
More info / Do it in PhotoShelter:
– Quick Send step-by-step
– A breakdown of all of your sharing/delivery options
– Don’t need the restrictions? Our anonymous download option is what you’re after.
6. Send it while you’re still on the move with FileFlow. (Plus, your clients can use it, too!)
In the sky when an editor emails you about licensing a photo? Stopping for gas during a cross-country trip and see a client emailed you saying they can’t find their images? Leave that hard drive at home but on a deadline? We’ve got your back.
With FileFlow, you can browse, share, search and download your files right from your mobile device.
What’s even better is that your clients can get in on the fun too. They can download the app and use it to get photos from you faster.
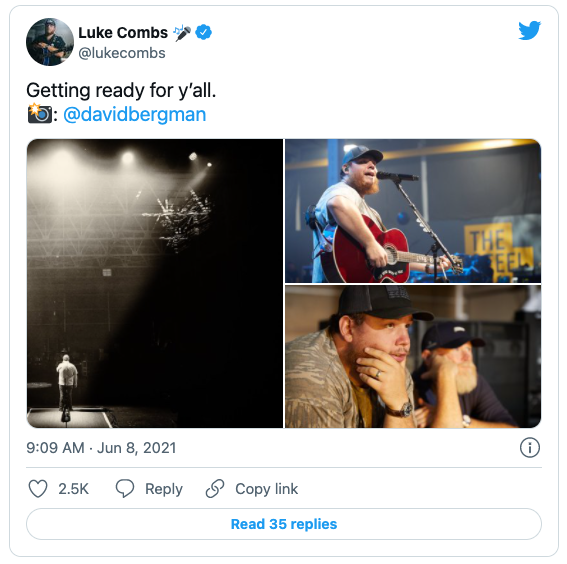
David Bergman, sports photographer and photojournalist turned music photographer, is a big fan of FileFlow. As the official tour photographer for Luke Combs and his band, Luke’s bandmates know that they can download the epic photos David has taken of them straight from FileFlow. That gets them onto Instagram and Twitter faster and helps keep the party going. Less texts and emails for David and more likes for the musicians.
The app itself has been around for a couple of years, but we are constantly surprised when we hear the complicated ways photographers are downloading their images and accessing their PhotoShelter accounts on the go.
Let FileFlow take the clunk away and get you back to that road trip, nap in the sky or, ideally, your next job.
More info / Do it in PhotoShelter:
– FileFlow help
– Download FileFlow in Apple Store
– Download FileFlow via Google Play
Our hope is that these little tips have piqued your curiosity around what else in your account you might not be taking advantage of. (We admit it, there’s a lot in there!) If that’s the case, always remember that we’ve got tons of instructional material in our Support Center and our incredible Tech Support team is always just an email or phone call away.
You May Also Like
-

Expert Advice and Top Tips from Pro Photographers for 2024
What’s one piece of advice you would give to aspiring or up-and-coming photographers? We asked nine experienced photographers and PhotoShelter members to share their top tips for those looking to get ahead in their photography careers. From finding your own visual voice to working with a mentor or photo assistant, each piece of advice listed […]
-

What’s On Your Photography Holiday Wish List?
The holiday season is around the corner and that means it’s the perfect opportunity to upgrade your gear or find that special gift for the visual storyteller or photography enthusiast in your life. We reached out to a handful of renowned photographers and PhotoShelter members, each with their unique styles and preferences, to bring you […]
-

Share a Photo That Means the World to You
We all have a photo that means the world to us. Maybe it’s one we made ourselves – the first photo from our first camera. It could be an old family photo in a beloved photo album. Or maybe it’s an iconic image that hangs on our wall at home. With World Photography Day coming […]